Your firm logo appears in the client-facing portal, sign-up page, and white-labeled emails. This article explains the upload process and image requirements.
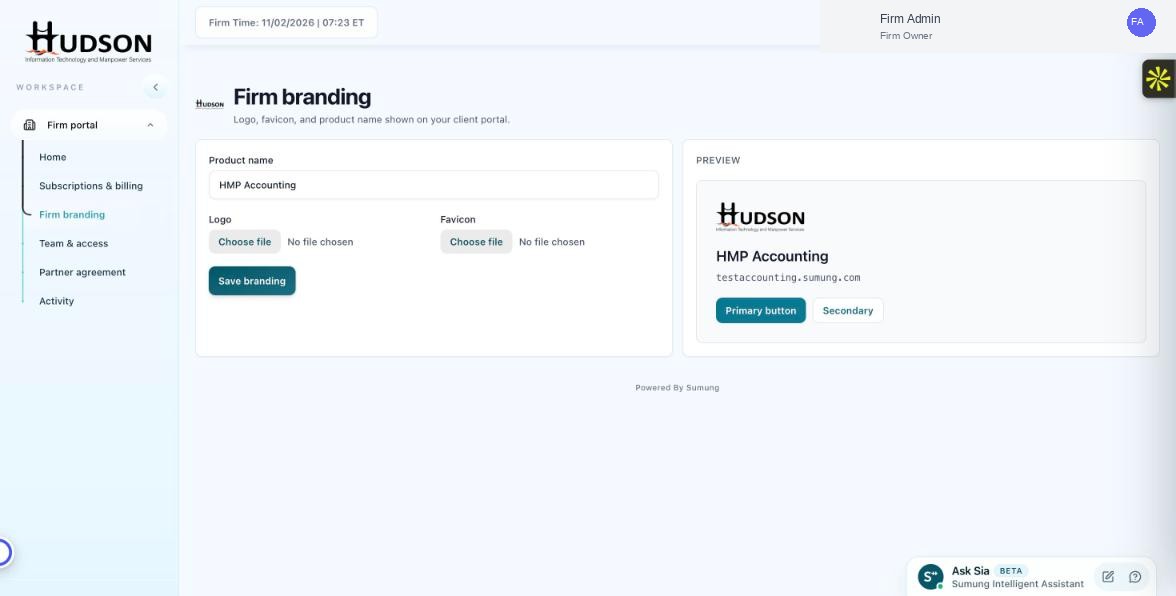
Firm branding — logo upload section with preview
What You Can Do
- Navigate to Firm branding in the sidebar.
- Under the 'Logo' label, click 'Choose file'.
- Select a logo file from your computer. Supported formats: PNG, JPG, SVG. Recommended size: 200×60 px or wider at 2× for retina.
- The selected filename appears next to the button.
- The right-side Preview panel updates immediately to show the logo in context.
- Click 'Save branding' to apply.
💡 Good to Know: Use a PNG with a transparent background for best results — it will look clean on light and dark backgrounds.
💡 Good to Know: Avoid logos smaller than 100 px wide — they may appear blurry in the portal header.
Related Articles
Was this article helpful?
Your feedback helps us improve our documentation.